Sunday, December 7, 2014

Heirloom ornaments

I saw this type of ornament posted and I just had to create one for a friend.  I started with a message written inside a greeting card from her mom that passed away last year.

The I imported it into design space so that I could create a cut file from her handwriting. I positioned the words then cut it out and transferred them to the ornament.

Finally I added some ribbon and feathers to the inside.  The feathers are symbolic of angel wings.  My friend was so excited and I am excited to help others create these heirloom ornaments.

Personalized Gifts

Here are a few items I made with vinyl that were personalized.  The cutting board has the vinyl on the bottom.  The glasses were etched with vinyl to block parts of the design.

Personalized Canvas

I am having fun designing these canvases for family and friends.  I am also accepting orders for these.

Box Card for Anniversary

I made this card because a friend ordered it for an anniversary.  She told me about the wedding and I added details to match the wedding.  Santa and an elf arrived and it snowed on their wedding day last year.  The bride wore red converse,  so I added them tied to the sleigh.  I hope they love it as much as I do.

Friday, November 7, 2014

Seasons

This banner was created for My Cricut Craft Room blog for the theme Seasons.

I searched for leaves and found the pennant from Pretty Pennants cartridge.  I went from there and used the leaves from ---- cartridge.  Finally,  I added my favorite words- live,  laugh,  love using Fontastic Fonts.

I had the explore draw the lines on the leaves and then I inked the edges of the leaves. Then I used my embossing tool and pressed on the leaves while pressing down on a piece of fun foam.  This helped the leaves to curl and look more realistic.

Finally, I strung ribbon through the pennants.  I used tacky tape on the ribbon so that I could attach the leaves. I really like how it turned out. 

Thursday, November 6, 2014

Wheels Theme


This card was created for My Cricut Craft Room Blog - Theme: Wheels

I wasn't sure what I wanted to created for this theme but once I saw this adorable robot, my decision was made.  I used the Robotz Cricut cartridge for the entire card.  The card base, the gear and the robot were all from this cartridge.  I also used Print then Cut for the robot then I cut an additional black layer as a shadow so that I could use black pop dots to raise the robot off the surface of the card.  I used a dots embossing folder to add some texture to the card, and I finished the card by adding some orange glitter.  I love how it turned out and I might just try another robot for another card.


Hope you enjoyed visiting my blog and I hope you got inspired.
Happy Crafting!
-Melissa


Monday, October 20, 2014

Birthday invitations

I made these invitations for a little girls first birthday.  They are my first invites that I made for a client.  I am super excited about these and I hope to streamline the process so that it doesn't take me forever and so that it feels like I am actually making money.

Monday, October 13, 2014

Baby Card

 
This is my post for My Cricut Craft Room.

These baby cards were made using my Cricut Explore.
 
The cartridges used were:
Craft Room Basics- onesie
Wrap it up- stork
Doodlecharms- bottle
Calligraphy Collection- welcome baby
Create a Critter 2- lion
Baby Shower- Baby
 
 
I welded 2 background shapes to create cards that were onesie and bottle shaped.  Then I was able to adhere the top layers. 
I used the print then cut feature for the word baby on the bottle and also the stork and lion.
I also embossed part of the onesie to add a little texture to it. I love embossing elements.
Happy Crafting!
-Melissa
 

Saturday, October 11, 2014

Halloween Decor

 
Thank you for joining us on My Cricut Craft Room's Blog Hop

Today I made a basket and luminaries for Halloween to share with you.

 
The cartridges used were:
Pumpkin Carvings- luminary images,  boo,
Word collage- haunted words
Designers calendar- leaf
Flower shop- leaf
Classroom Oct-Nov.- hat
Monster bash- witches brew
Teresa Collins Chic & Scary- spider,  mask,  spooky
Autumn celebrations- pumpkin
 

Each item in the basket was either done with print then cut on the Explore or cut normally and adhered to a wood stick before it was placed in the foam in the basket.  Some of the spiders were attached to wire and placed in and around the basket.
 
 
The luminaries are double sided, so pay attention in the picture.  The basket is the same, but the bags are different.  I actually made a set of 4 different ones, but I never got around to making the other 2.  I also created a lid to put on top so that I couldn't see the vellum that was adhered on the inside.  The lid could be placed on the top or bottom to help hold it together.  I decided not to glue the bottom so that they could be stored flat.

Here is a close-up of the hat and mask so that you can see the details.  I inked the outer edge of the band on the hat and I used my embossing plates to do the orange on the hat and the masks.  I also rubbed Perfect Pearls on the mask to add extra dimension. 
I hope you enjoyed these fun projects that I made.  Please leave me a comment and visit the other great ideas on this Halloween Decor Blog Hop.
Happy Crafting!
-Melissa
 
Next you will go to Jen Goode's Blog
 
This is the line-up for today.
3. http://craftgirl5586.blogspot.com Melissa Howard **You are Here** 
4. http://www.100Directions.com Jen Goode  **Go Here Next**
8. Craft Lovers Come Here- http://CraftLoversComeHere.blogspot.com  

Sunday, October 5, 2014

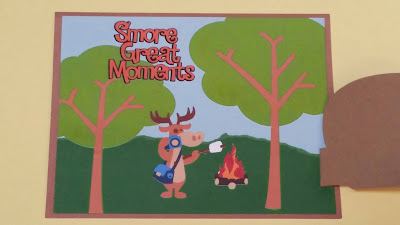
Camping Card

This camping Card was created using the Explore and print then cut.
The cricut cartridges used were:
Outdoor man- fire
Campin critters- camper,  tree,  stick,  moose
3 Birds on Parade- smore great moments